Table of Contents
Note: This guide is aimed at FDM Printer Maintenance.
Introduction
Maintaining your 3D printer properly is essential not only to get good-quality prints but also to prolong the lifespan of your 3D printer. I will walk you through crucial maintenance steps in this beginner’s guide. From cleaning the print bed to lubricating moving parts which will help to keep your printer operating smoothly. Whether you’re a newbie or an experienced hobbyist, following these steps will help you avoid common issues and keep printing amazing parts.
Why 3D printer maintenance matters (importance of 3D printer maintenance)
3D printer maintenance does not only matter for getting good quality 3D prints. It will help you avoid costly part failures in your 3D printer. Performing regular maintenance of your 3D printer will help you prolong the lifespan of certain components which will otherwise lead to expensive repairs or replacement parts.
Skipping regular maintenance will lead to issues like nozzle clogs, worn-out rollers, worn-out belts, and lead screw nuts, which will severely impact the quality of your prints.
Tip: Prevent future frustrations by setting up a maintenance schedule!
Step 1: Clean the Printer Bed
This is an obvious one. But it is vital. clean print bed is vital for proper adhesion of parts. Clean the bed or the print surface with isopropyl alcohol and a lint-free cloth.
You will be able to visually identify if your bed adhesion is poor. You will see the edges of parts lift off from the bed. if you think your bed adhesion is good, then you can skip this step.
Step 2: Check and Replace the Nozzle
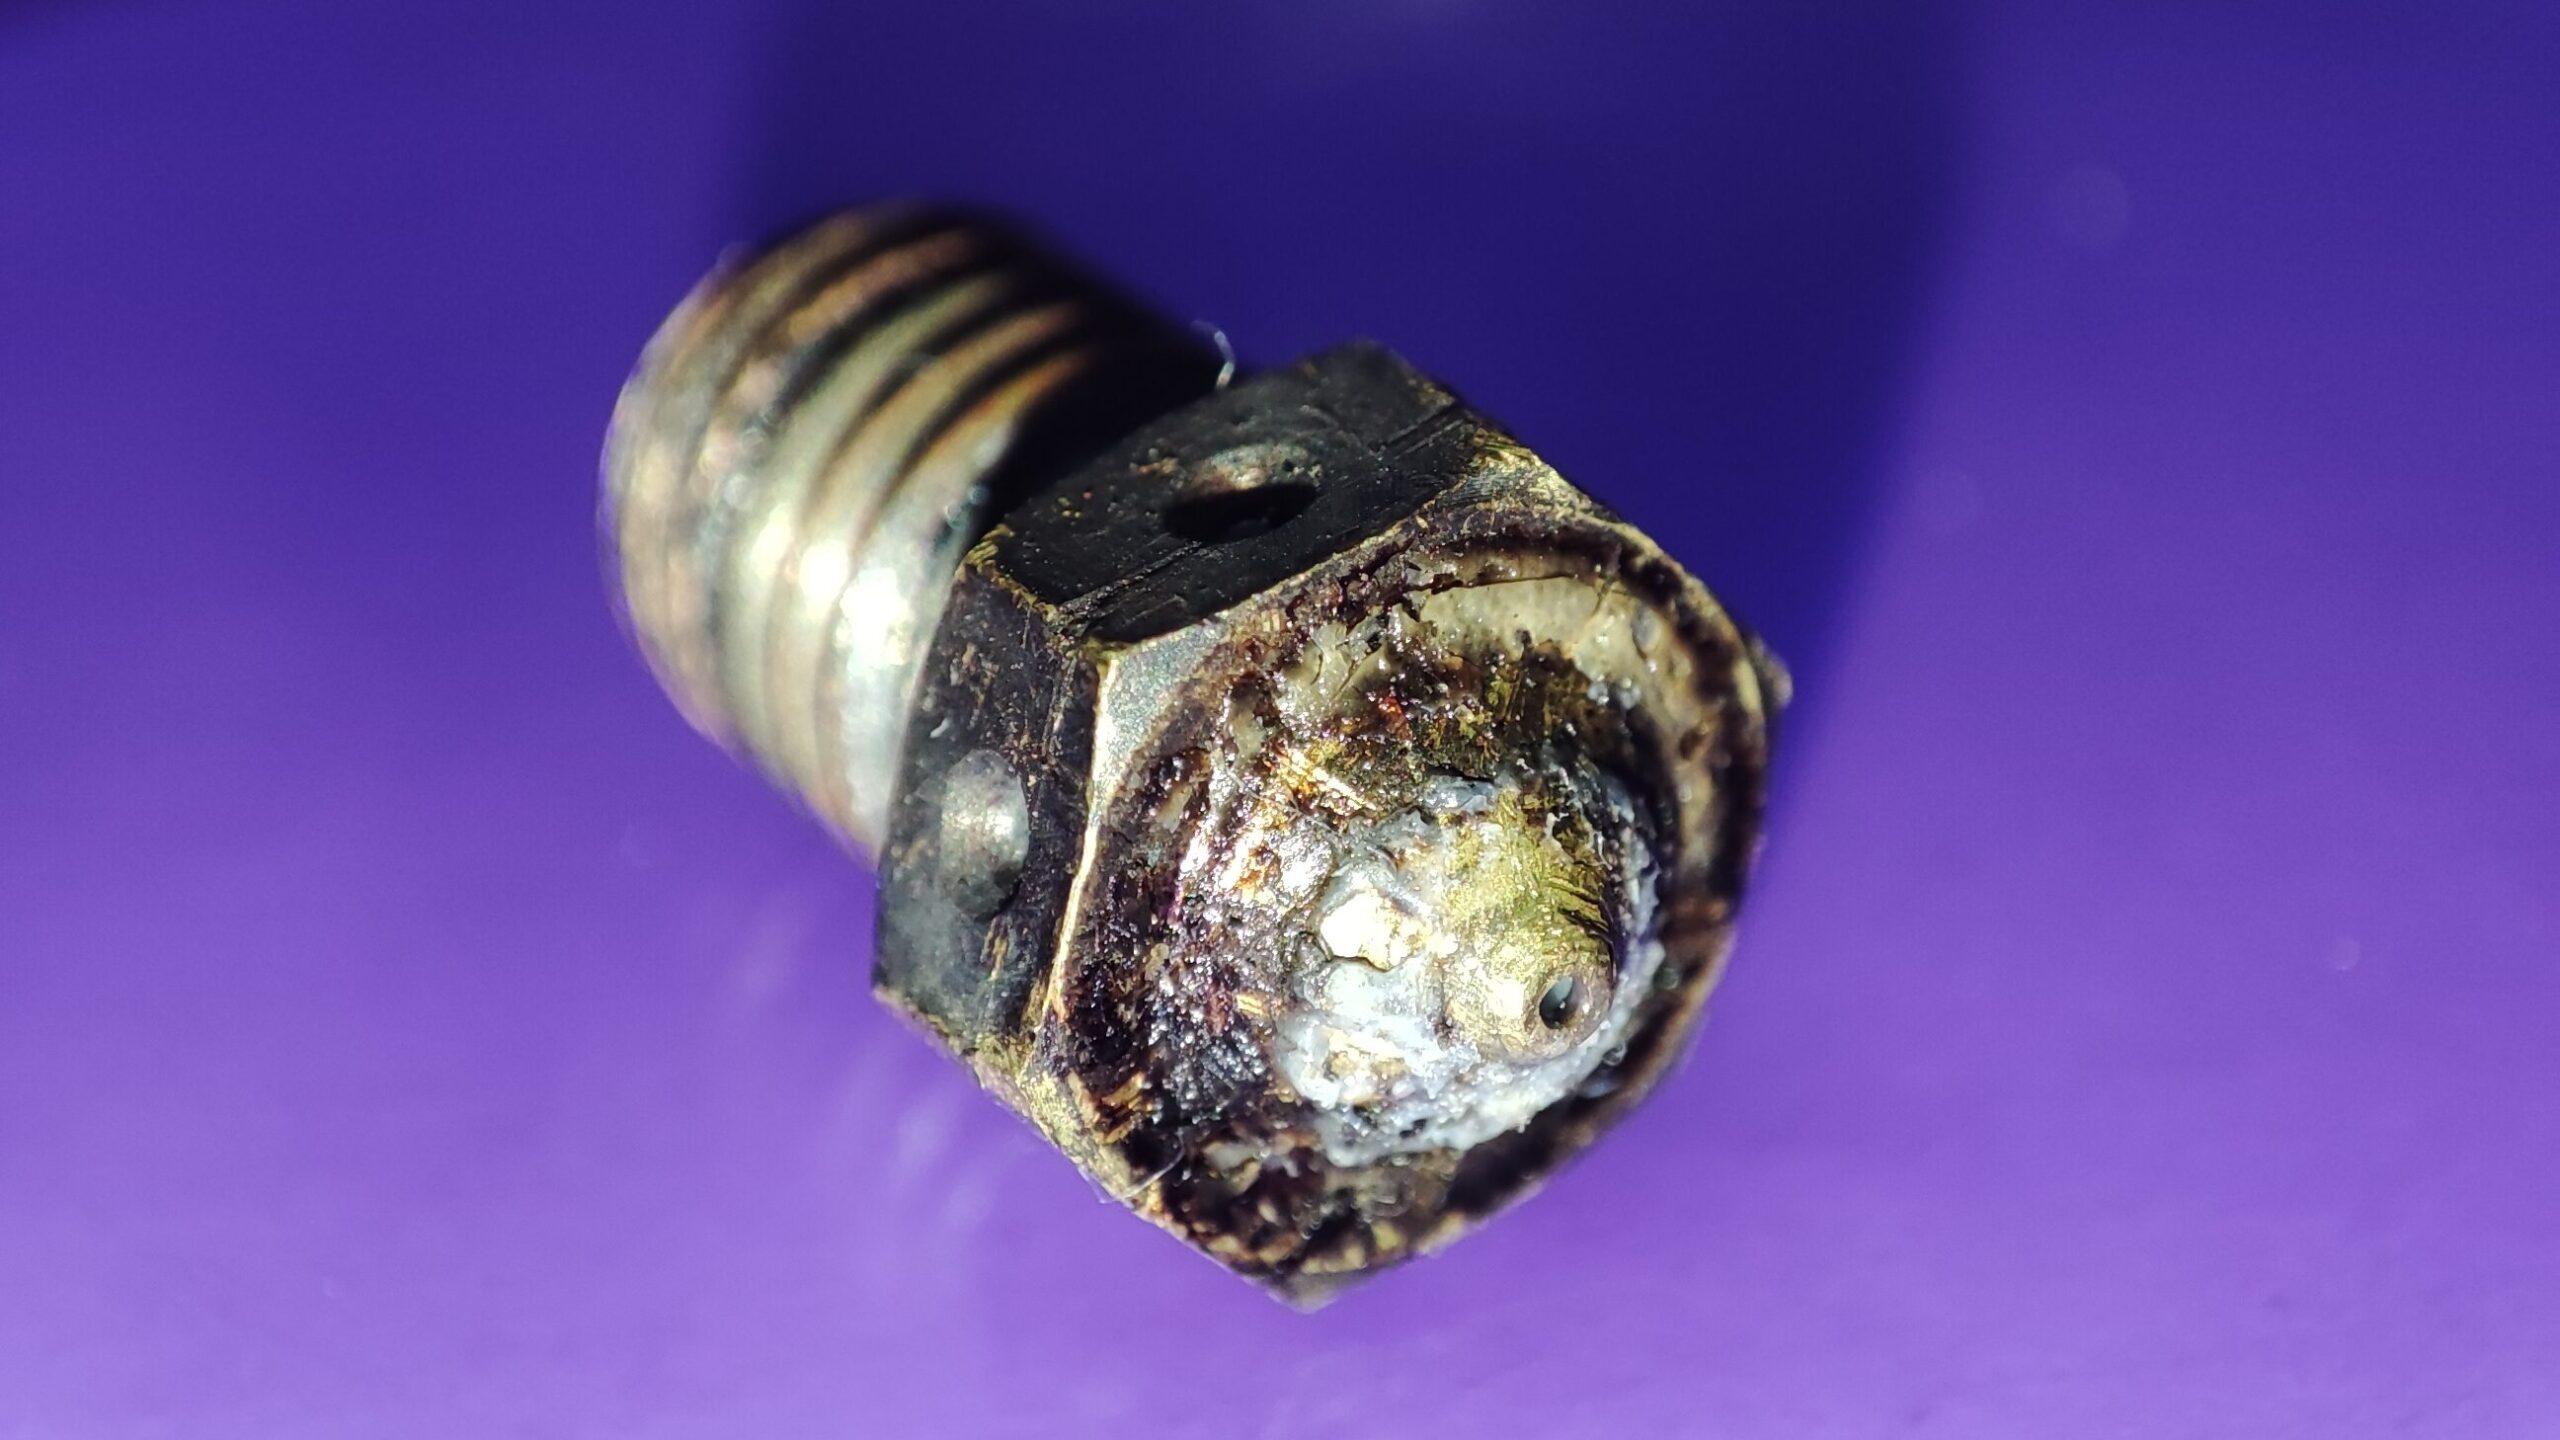
Nozzles can easily get clogged. And it’s an obvious thing we tend to overlook when troubleshooting our printers. We take it for granted that our nozzles are prone to clogs and damage. The image above shows a neglected nozzle that hasn’t been cleaned.
You should check your nozzle for debris when you’re doing maintenance. You can use a nozzle cleaning kit to clear up minor blockages but I highly recommend replacing it if it’s badly damaged since they are extremely cheap. And please don’t poke the nozzle with metal objects to clear up blockages, it will cause more harm than good. It will scratch the bore of the nozzle and make it worse.
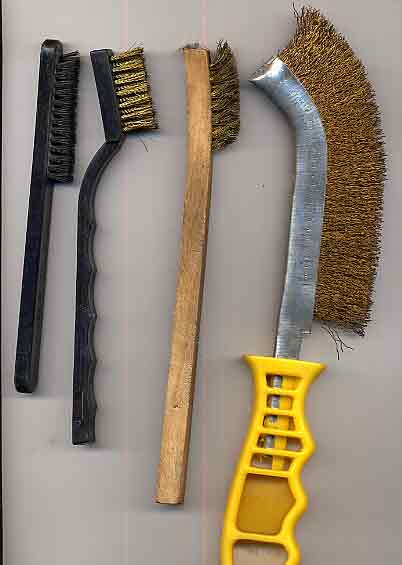
You can use a brass wire brush to clean the outside of the nozzle. First, heat up the hot end till the plastic becomes malleable, then use the wire brush to wipe it off.
Pro tip: Do an extrusion test. Manually move the Z axis about 2CM above the print bed. Heat the nozzle to the temperature of the filament you’re using. and manually feed the filament by moving the extruder. Doing this will allow you to see if there is anything wrong with your nozzle.
Step 3: Inspect and Tighten Belts & Screws
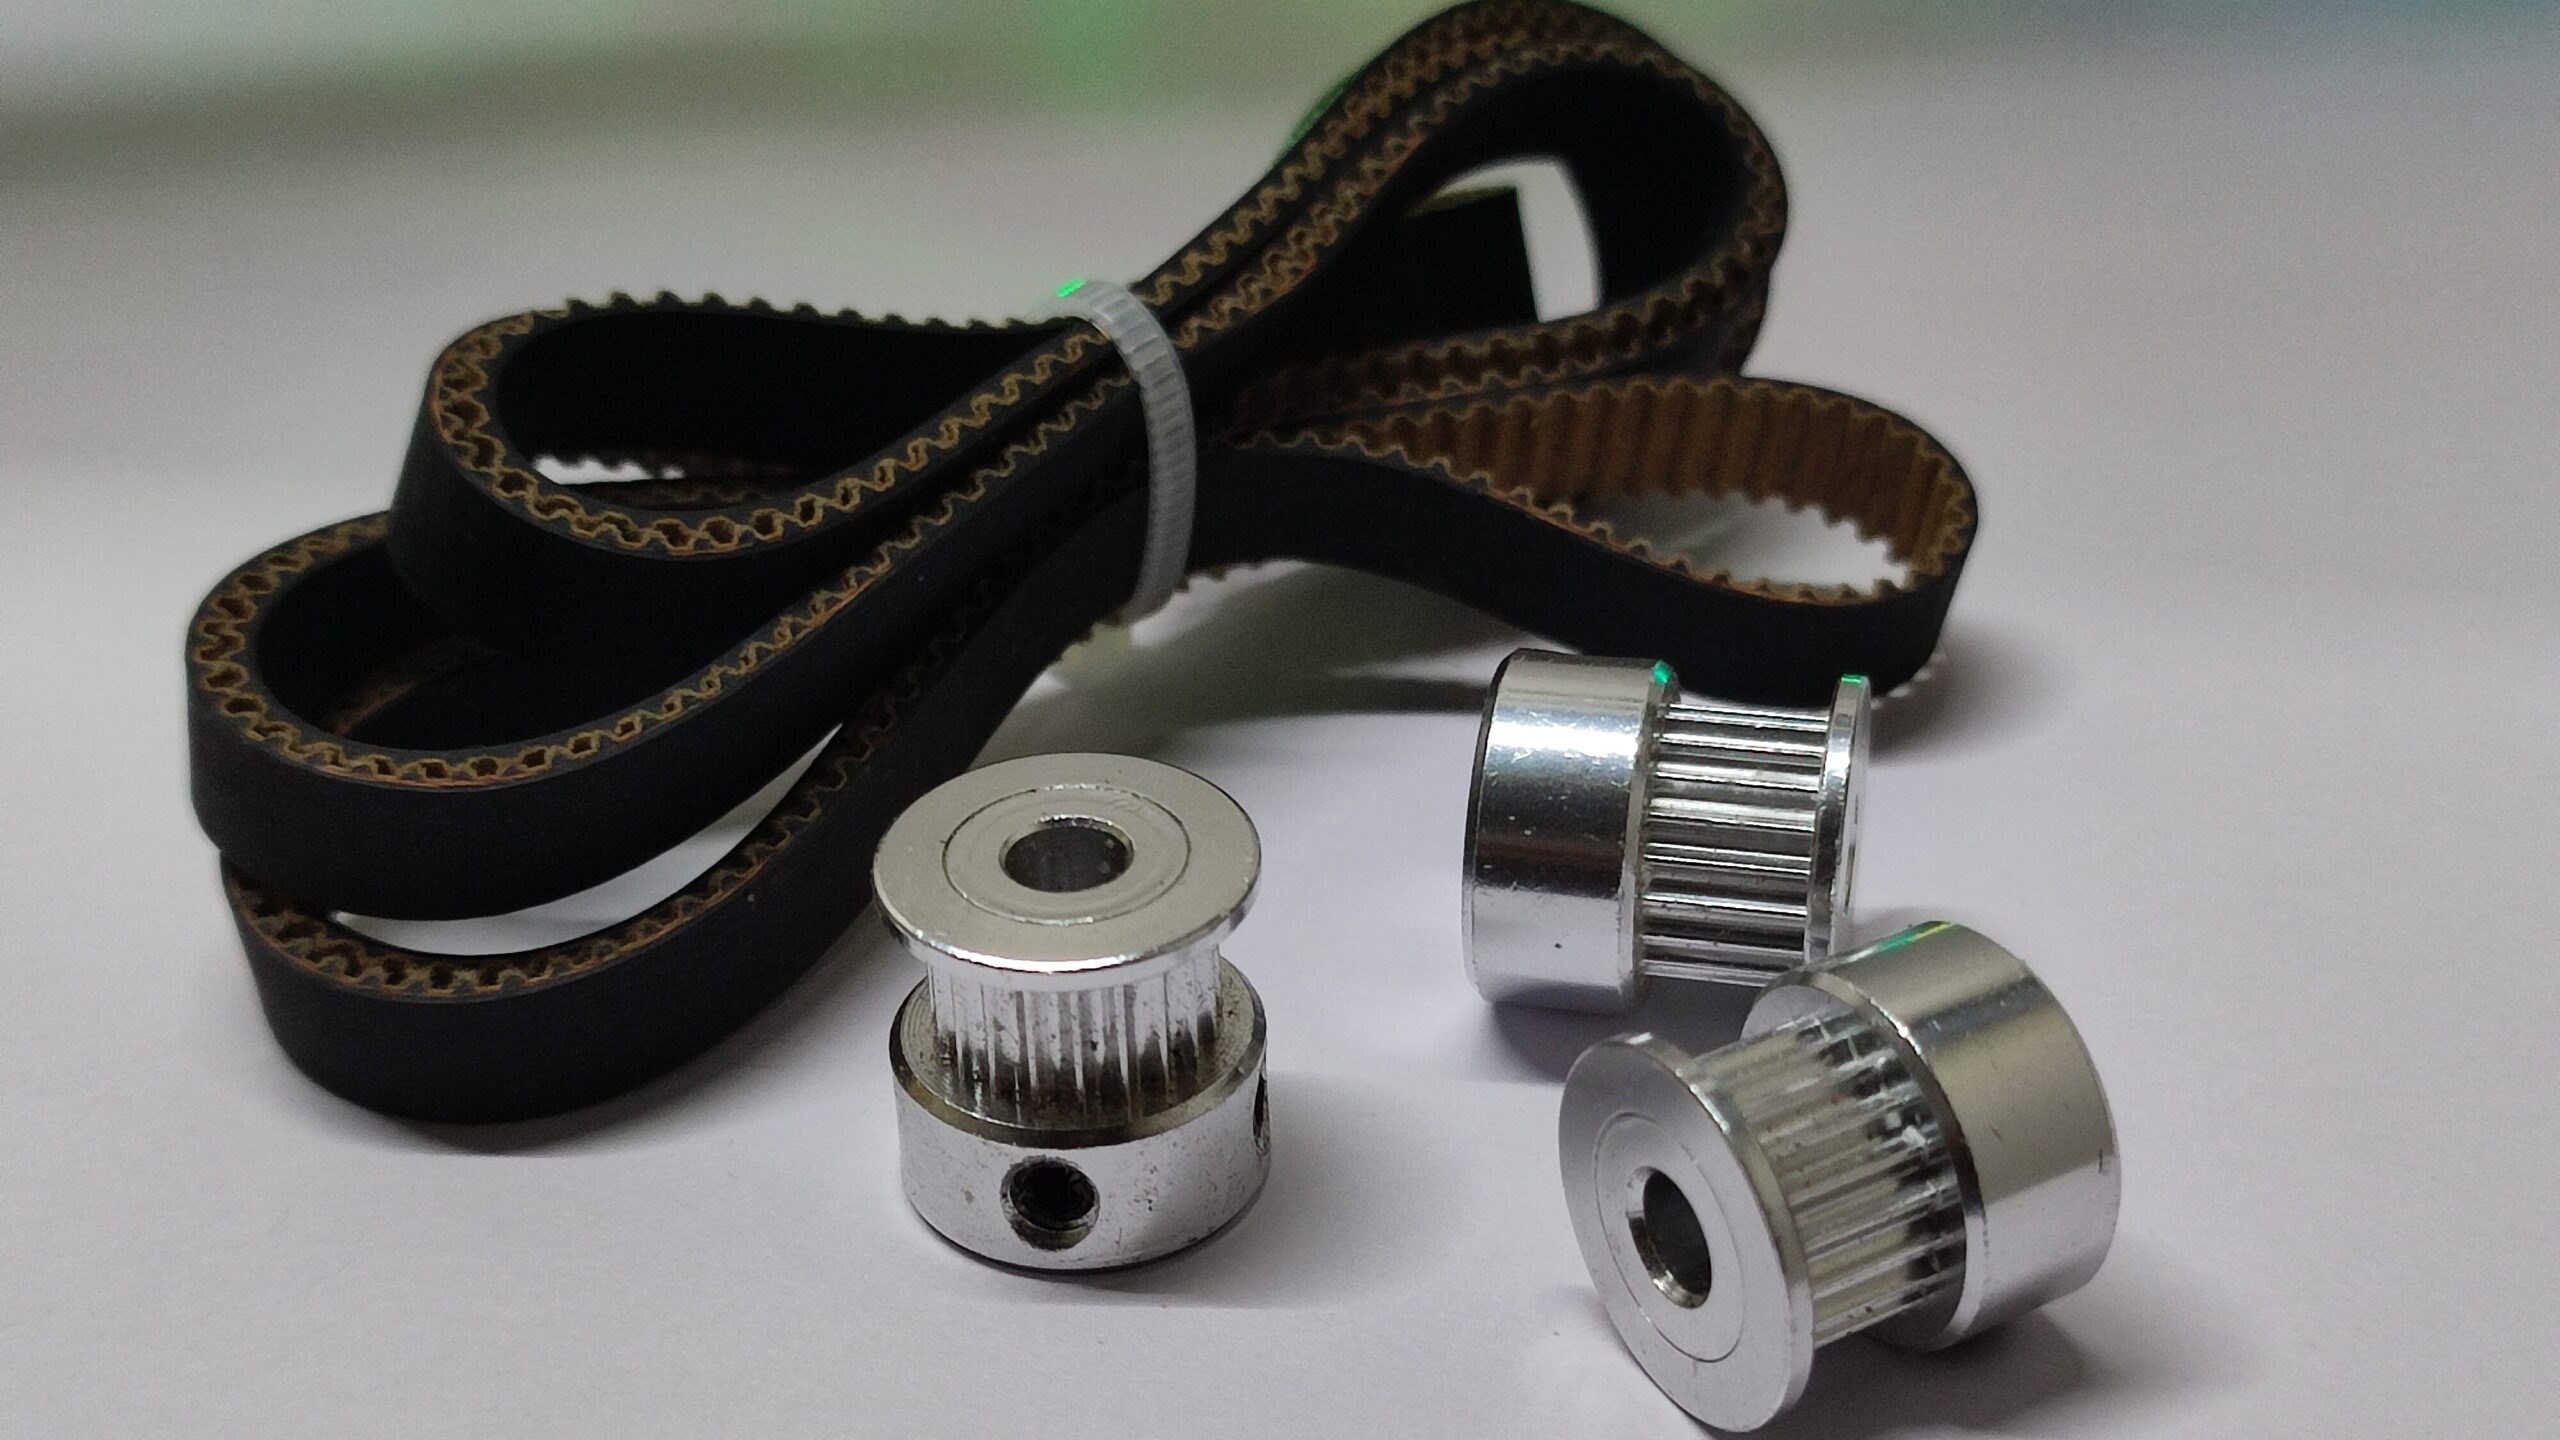
Most 3D printers use belts to move the X and Y axes. Having loose belts can cause steps to be skipped. this will lead to inconsistent prints and dimensional inaccuracies (the prints will be bigger or smaller than the model). On the same note overly tightened belt will cause the motors to overheat.
This can be avoided by periodically inspecting the tightness of the belts. The tension should be firm but not overly tight when adjusting the tightness.
If your printer does not come with a belt tensioning mechanism you can follow this link to find models for a 3D printable belt tensioner that you can print and install. There are many models you can choose from, find one that suits your printer and use it.
Helpful tip: Press lightly on the belts – they should have some give but shouldn’t sag.
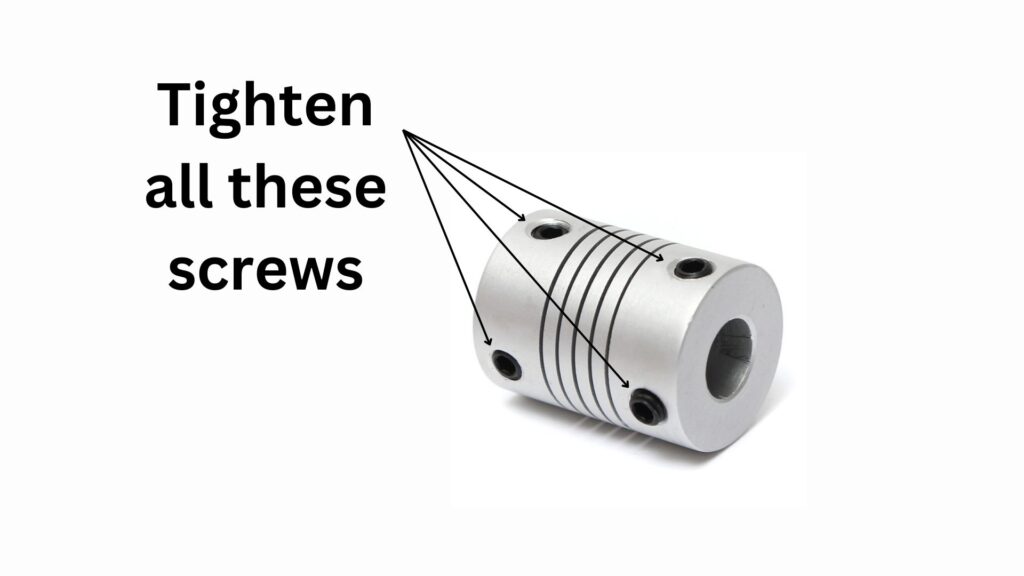
Make sure to tighten all the nuts in the stepper motor couplings. One of the biggest things people tend to overlook is not tightening these screws. these couplings connect the stepper motor to the lead screws and if they get loose the prints will fail.
These nuts will loosen after a while due to regular vibrations and acceleration.
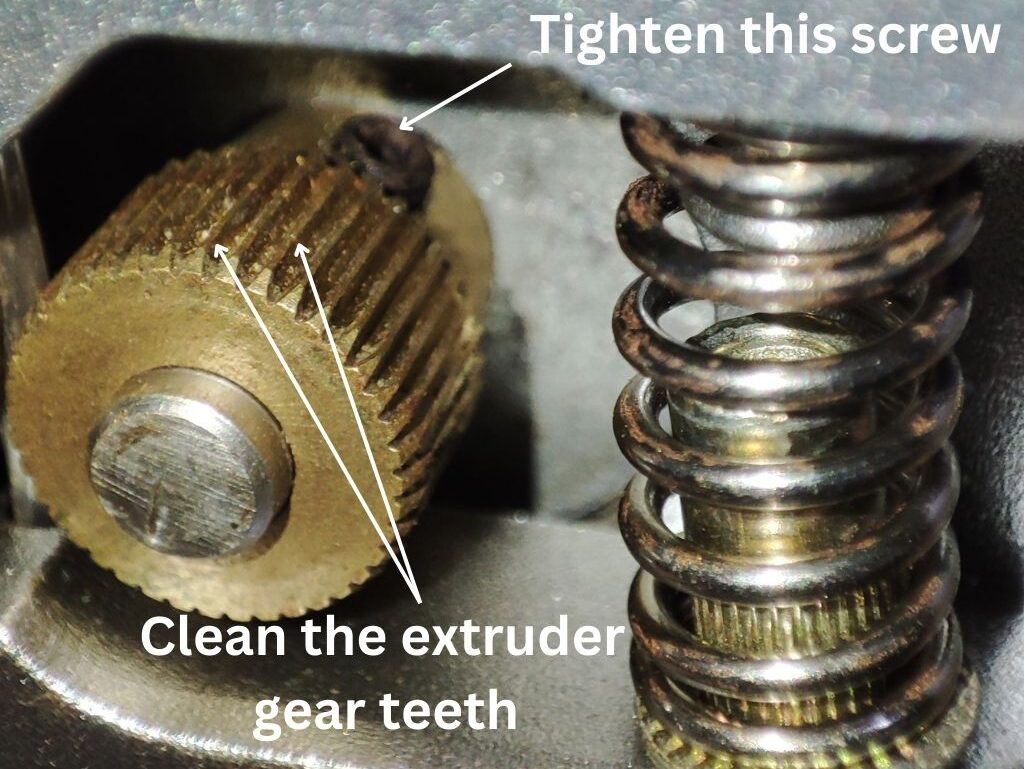
Also, make sure to tighten the extruder gear screw. If the extruder gear screw is loose you will suffer from under-extrusion in your 3D prints. While you’re at it, also clean the extruder gear teeth. Filament and dirt tend to accumulate between these teeth.
Step 4: Lubricate Moving Parts
There are lots of moving parts in a 3D printer. They move a lot, back and forth when performing print operations. these parts experience friction and wear during those print moves.
To reduce friction and wear, we need to lubricate them. We can use a silicone-based lubricant or grease. Places where you should apply grease in your 3D printer are,
- Lead screws
- Bearings
- Smooth rods (if applicable)
- Linear rails (if applicable)
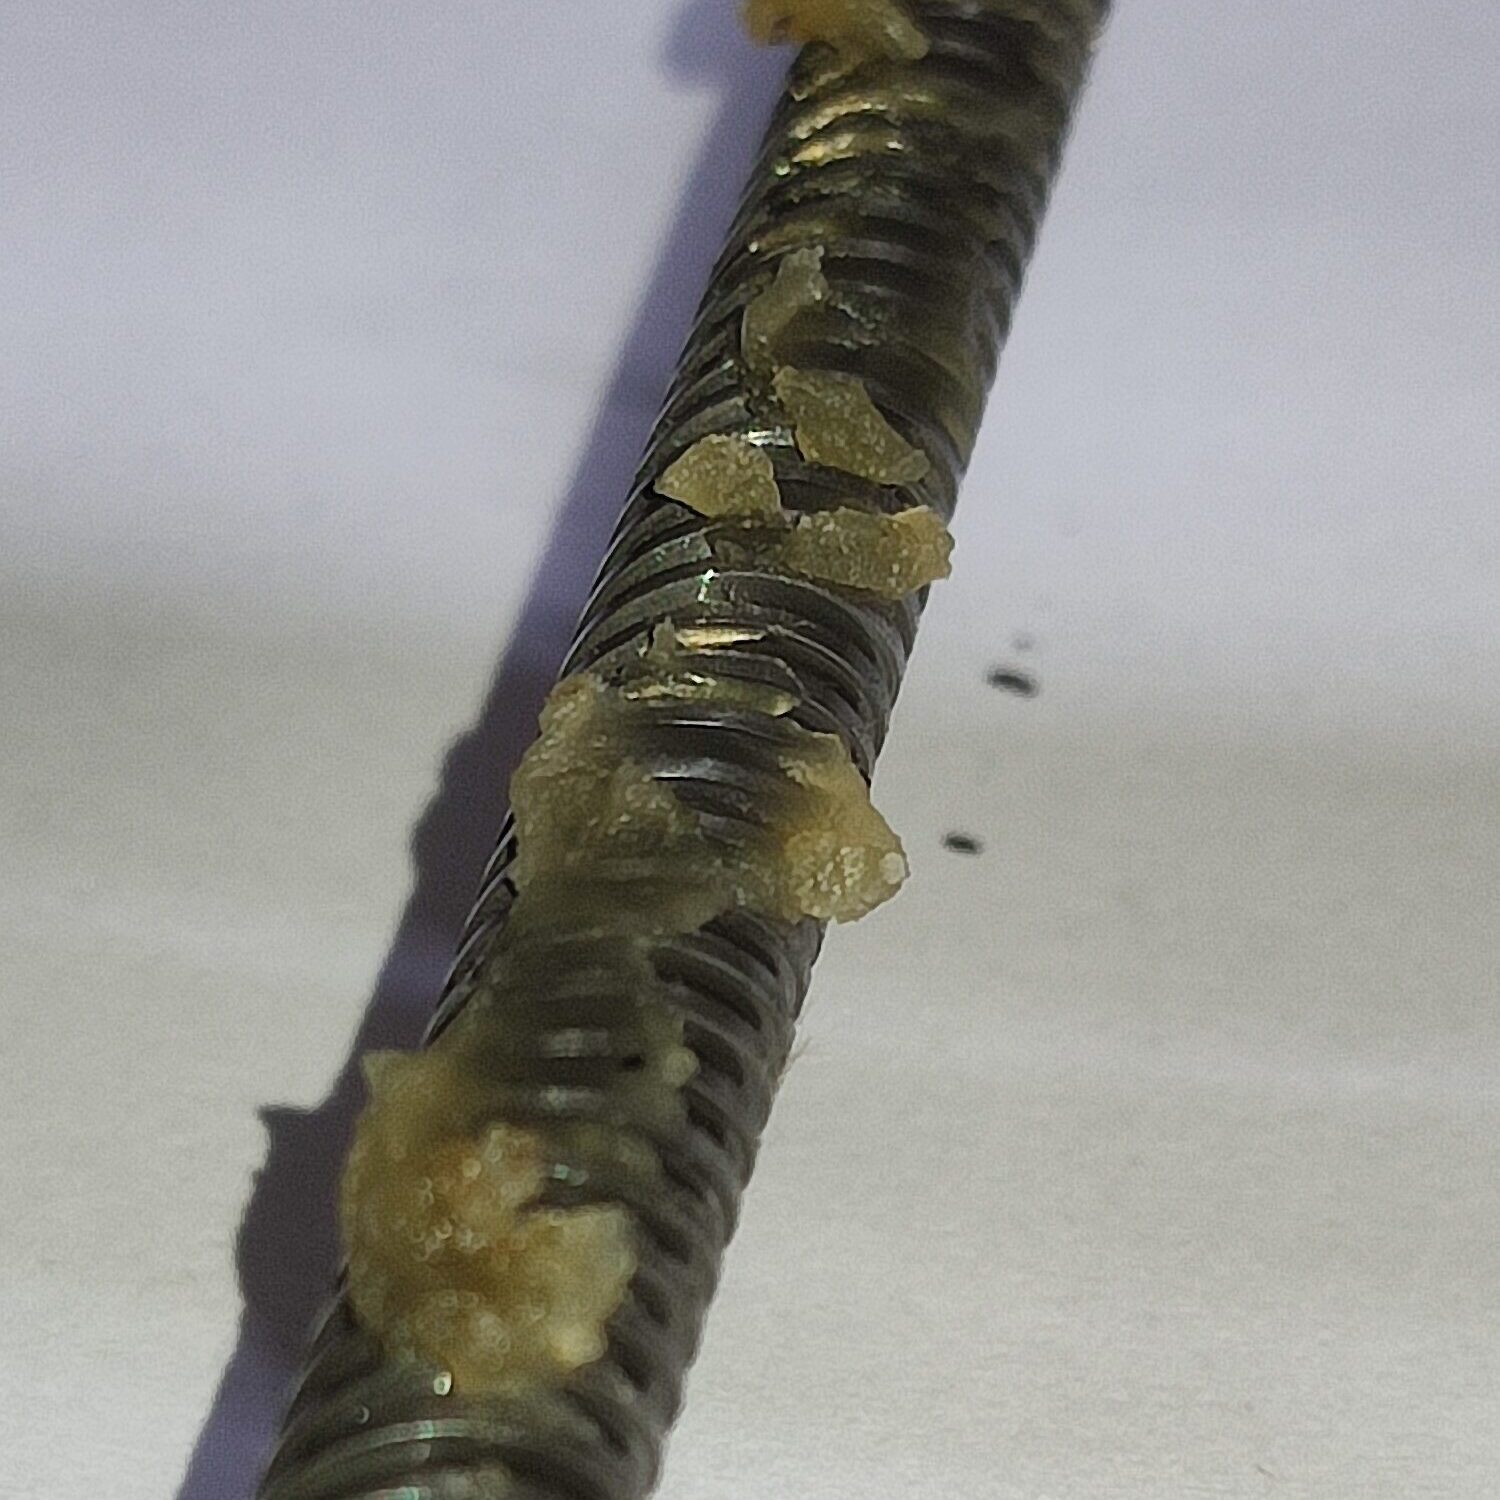
Clean the smooth rods (if your printer has them) and lead screws with a tissue soaked in some IPO. It’s better to clean these before applying grease since dust and dirt can build up on them. Make sure to apply a thin coating because less is more in this context. And don’t dump a bunch of grease in the same spot. spread it out across the length of the lead screw.
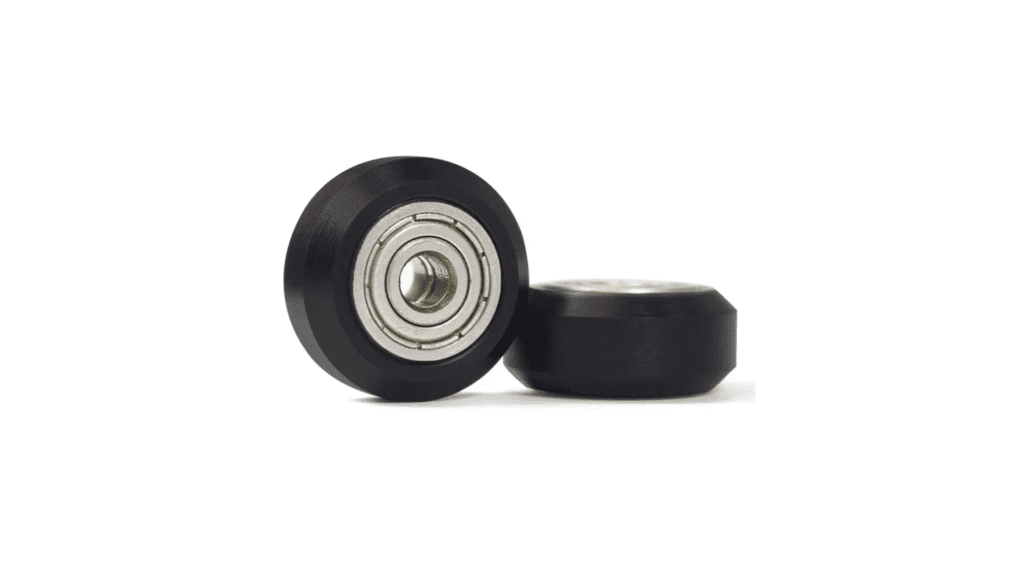
If your printer has rollers and V slot aluminum extrusions (like most Creality printers), First check the hot-end carriage and the bed carriage to see if there’s any wobble, if there’s some wobble then the rollers are loose and we need to tighten them. While you are at it clean the rollers and check if the rollers are damaged or out of shape. if the roller’s polycarbonate is worn out or change them out for new ones.
If your printer is equipped with linear bearing blocks that have ports to inject grease, put some new grease in them. If your printer uses linear rails, clean them and lubricate them with grease. Linear rails usually have a port where you can inject grease.
Do not apply oil or grease on motors, fans, and belts. These don’t need lubrication and could be negatively impacted by grease buildup.
You can use a few different types of lubricants. You can use the information below for reference.
- PTFE-based Lubricants (Dry Lubricants)
- Pros: PTFE (Teflon) lubricants are excellent for reducing friction and repelling dust. They are ideal for lead screws, as they don’t attract debris or dust, keeping the mechanism clean.
- Common Types: Dry PTFE sprays or lubricants.
- Example Products: DuPont Teflon Non-Stick Dry-Film Lubricant, Super Lube Dri-Film Lubricant.
- Lithium Grease
- Pros: Lithium grease is commonly used for metal-on-metal contact points like lead screws. It provides long-lasting lubrication and is great for heavy loads.
- Common Types: White lithium grease is often used for 3D printers.
- Example Products: WD-40 White Lithium Grease, Super Lube Multi-Purpose Synthetic Grease.
- Silicone Lubricants
- Pros: Silicone-based lubricants are suitable for plastic components, but they can also work well on metal rods and smooth surfaces. They provide good lubrication without leaving a greasy residue.
- Common Types: Silicone spray or grease.
- Example Products: 3-IN-ONE Silicone Spray, WD-40 Specialist Silicone Lubricant.
- Machine Oil (for Smooth Rods)
- Pros: Lightweight machine oil can be used for smooth rods to keep the linear bearings or bushings running smoothly.
- Common Types: 3-in-1 oil or sewing machine oil.
- Example Products: 3-IN-ONE Multi-Purpose Oil, Super Lube Oil.
Step 5: Tighten Printer Frame Screws
If your printer frame is made up of V-Slot aluminum extrusions, The screws which hold the extrusions will loosen over time after repeated vibrations during the prints. We have to tighten them. Before tightening them make sure all the extrusions are perpendicular to each other. You can do this using a set square. If the extrusions are not square, the motors will struggle when using or pulling the carriages. Which will heat the motors and motor drivers. Make sure the frame members are square and tighten the frame screws.
Step 6: Calibrate and Level the Print Bed
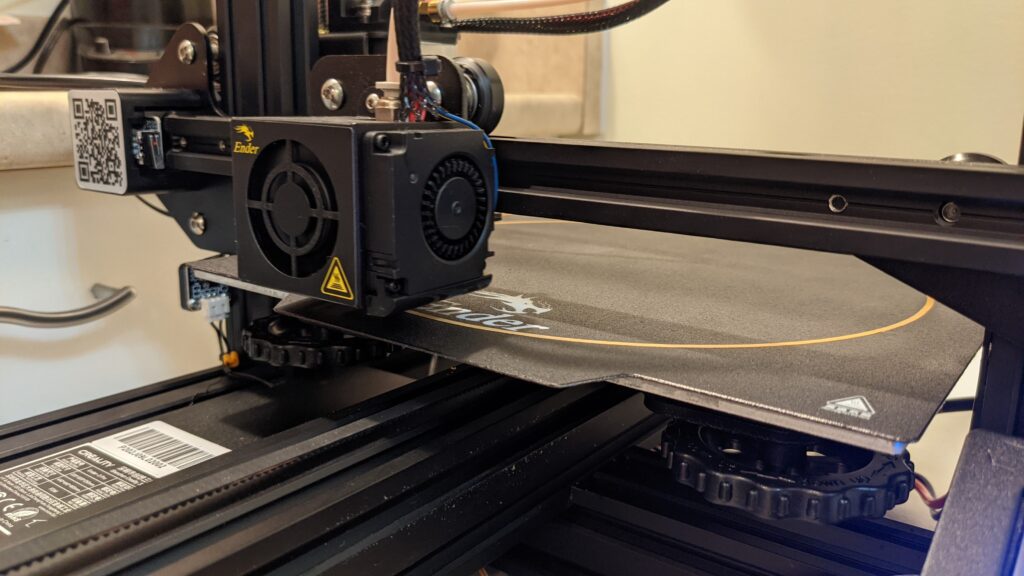
A properly leveled print bed is essential to get proper adhesion. Even if you have a clean print bed, if the bed is not leveled, then it’s kinda useless. If your printer has an automatic bed leveling system, then this step will be easier. But if you don’t, then you can use the paper method to level the bed. There are a lot of tutorials on youtube if you search “how to level the print bed with the paper method”.
Step 7: Check the cables
Cables and wires are prone to stress and strain when they’re constantly on the move (High-Stress Areas). Especially the Hotend and heat bed cables. Hotend heater cartridge wires, thermistor wires, nozzle cooler wires, and part cooler wires bend a lot when the printer is being used. check those for any damage. Damaged wires could cause shorts. This could lead to fire hazards or the printer motherboard to fail.
Check the connectors. Connectors that are oxidized or corroded will not conduct the same amount of current as a non-corroded connector. The same goes for loose connections. Make sure the connectors are free of oxidation and properly tightened. This personally happened to me and the plastic connector had melted due to the heat generated from the oxidized connection. You can use different methods to stop the corrosion of connectors.
- Dielectric Grease-non-conductive silicone-based grease that helps protect electrical connectors from moisture and oxidation.
- Contact Cleaner and Protectant Sprays-specialized sprays designed for cleaning and protecting electrical contacts.
- Anti-Corrosion Coatings-Anti-corrosion sprays or coatings are designed specifically to protect metal components from rust and oxidation
- Vaseline (Petroleum Jelly)-A more budget-friendly alternative to dielectric grease
- Use Gold-Plated Connectors.
If you keep the printer in a humid environment using the above measures could save you a lot of money.
Inspect Cable Strain Relief, If your printer doesn’t have proper cable strain relief you can add some cable guides or zip ties at key points to reduce stress on wires. Make sure wires and cables don’t catch on the moving parts of the printer (ie. print bed, hot-end carriage) this could damage the insulation of the wires and lead to shorts.
You can add cable sleeves and braids to manage the cables neatly.
Step 8: Checking the PTFE tube
If you’re using a Bowden-style printer, then your printer will have a PTFE tube guiding the filament from the extruder to the hot-end. The PTFE tube will deteriorate after some time since it stands flush against the backside of the hot nozzle. We will have to cut this deteriorated piece of PTFE tube and put it back during the maintenance. Otherwise, it will lead to clogs and stringing.
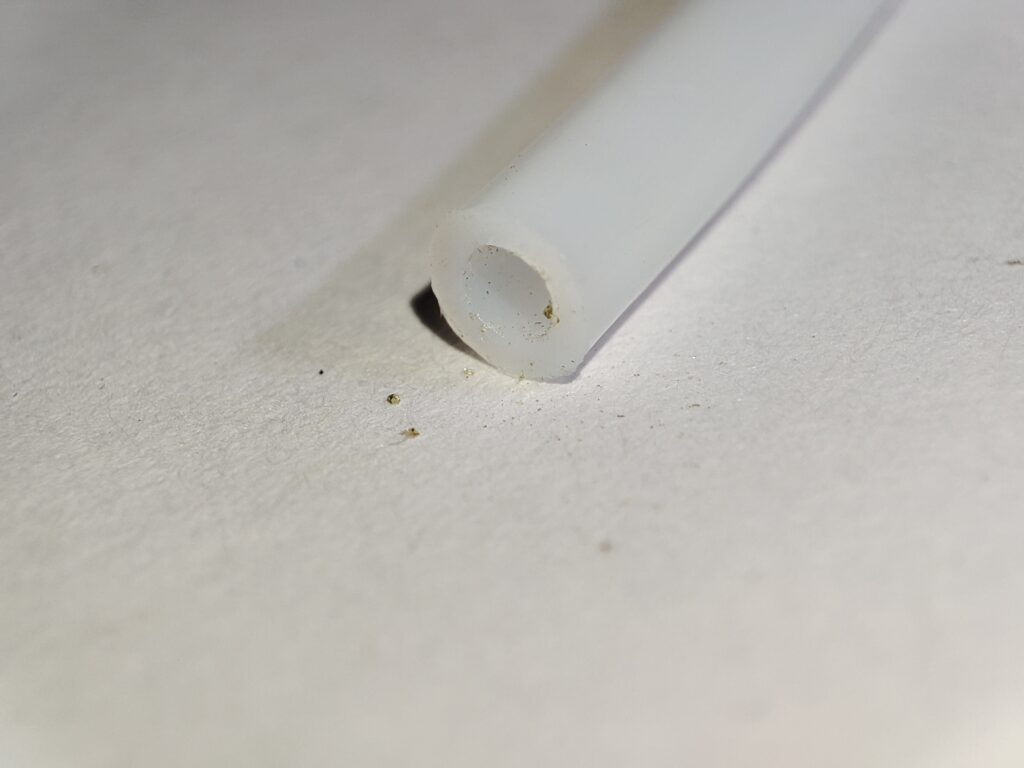
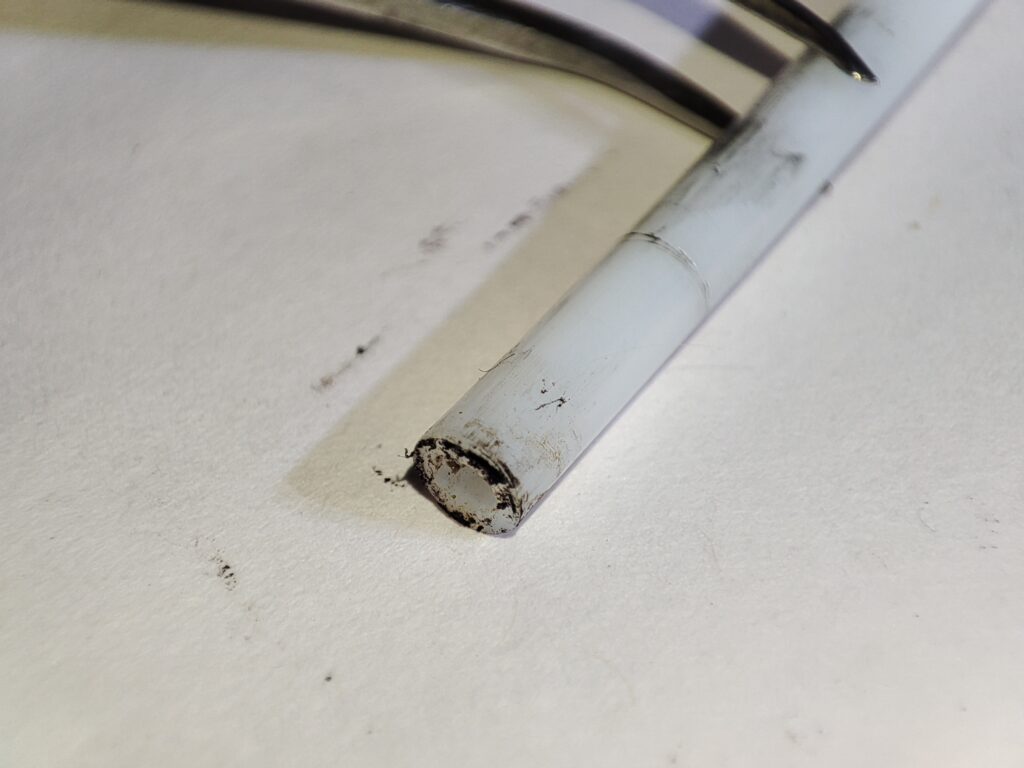
When you’re snipping off the deteriorated PTFE tube, make sure the cut is 90° otherwise the end of the PTFE tube will not sit flush with the backside of the nozzle.
Step 9: Update Firmware and Software
New software and firmware updates provide new features and bug fixes that can greatly improve the quality of your prints. Make sure to update both the firmware of your printer and your preferred slicer software. Slicer software updates will provide new features for better first-layer adhesion, perimeter generation, support generation, hiding seams, and infill.
Bonus Tips for Extending the Lifespan of Your 3D Printer
Use a dust cover: Using a dust cover when you are not using the printer will help with keeping the dust away from all the moving parts like lead screws, bearings, and smooth rods.
Avoid overheating: Let the printer cool off between prints. The motor windings and stepper motor drivers heat up when you use them for prolonged periods. especially the X-axis and Y-axis motors and their corresponding drivers which do most of the heavy lifting. letting them cool off between prints will extend the lifespan of the motors.
Keep spare parts: Keeping a few spare parts is very handy to avoid downtime. Especially the ones that are prone to fail like a few nozzles, belts, and hot-end heater cartridges. etc
Check the Power Supply and Fans: The power supply works constantly while you are using the printer. Make sure it’s well-ventilated and there isn’t dust buildup inside it. Clean the power supply fan to remove any dust. If you have access to compressed air you can use that to clean the inside.
Use a filament Filter/Oiler: You can 3D print a filament filter/oiler to clean the filament. This will prolong the lifespan of the hot-end and the nozzle. The cleaning up you will have to do on the extruder gear will be minimal. You can follow this link to find models for filament oilers.
Frequently Asked Questions
-
How often should I perform maintenance on my 3D printer?
You should perform maintenance on your 3D printer every 100 hours of use or every 3 months, whichever comes first. This includes cleaning the print bed, lubricating moving parts, and checking for any loose hardware.
-
What are the key areas to focus on during 3D printer maintenance?
Lead screws, smooth rods, belts, extruder, hotend and connectors. Pay attention to lubrication and tightness of belts and screws.
-
How do I know if my 3D printer needs lubrication?
If you hear grinding, motors struggling, squeaking, or jerky movements while you’re printing your printer requires lubrication. You can also identify this by inspecting the prints, if the prints have defects in perimeters or if you have noticed that your prints have lowered in quality that’s also a sign.
-
How often should I replace my 3D printer’s nozzle?
Generally, you should replace your 3D printer’s nozzle every 200-500 hours of use, depending on the material and printing quality requirements.
-
What should I use to clean the build plate?
Use a lint-free soft cloth or paper towel dampened with isopropyl alcohol to clean the build plate.
-
What should I do if my 3D printer starts making unusual noises?
Unusual noises often indicate a mechanical issue. Check for loose screws, improper belt tension, or dry moving parts that need lubrication. You should also inspect the stepper motors and ensure the printer is on a stable, flat surface to reduce vibrations.
