How to configure Marlin Firmware
In this article, we are going to learn how to configure marlin firmware. Marlin is a very user-friendly, open-source, and highly customizable firmware. If you learn how to customize the firmware to suit your needs, I dare say its capabilities are endless. We are going to learn how to customize the firmware to work with the DIY 3D printer we made. Because we didn’t use some features like automatic bed leveling and heated bed in that build, this article will not fully cover all the features in the marlin firmware. But I’m planning on doing complete one in the future.
Because Marlin is a huge firmware, and I will not be able to cover everything in this article, if you want to find something that isn’t included in this article, you can go to Marlin’s official website and find it. How to configure marlin firmware official site.
Note: Marlin is very user-friendly, Every line of code is well explained with comments. Most of the changes we have to do is simply enabling and disabling things. We just have to add two slashes “//” to disable things and remove those slashes to enable things. Sometimes you will have to change some codes from “true” to “false”. The point I’m trying to make here is that, don’t get overwhelmed seeing the huge lines of code. If you go through it slowly you will see that it’s very user-friendly.
for example,
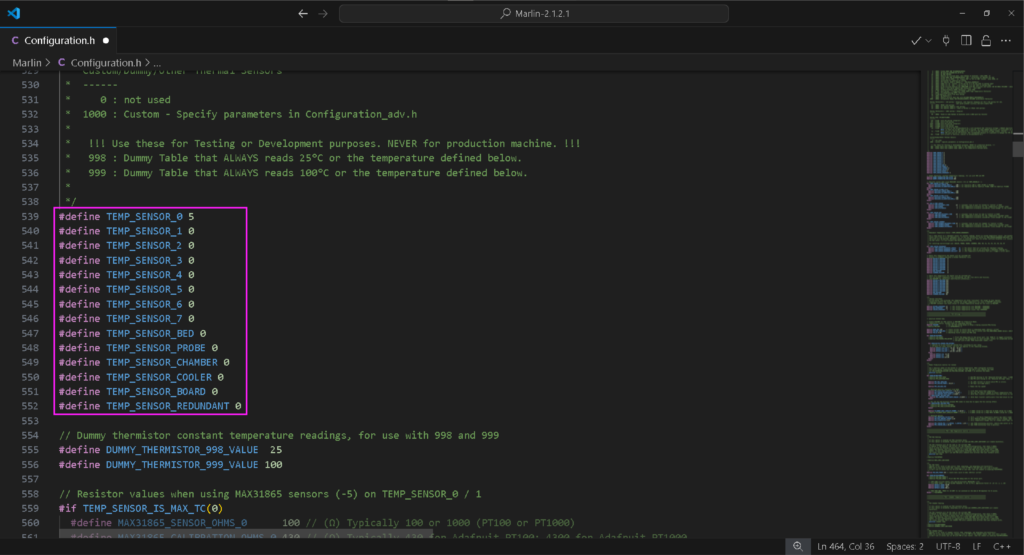
This is the thermistor section of marlin firmware. I’m only using the “TEMP_SENSOR_0” right now. That thermistor is used for the hot end. I don’t need any other thermistors to be active. All I have to do to disable them is to add a double slash (“//”) IN front of them to turn these lines into comments.
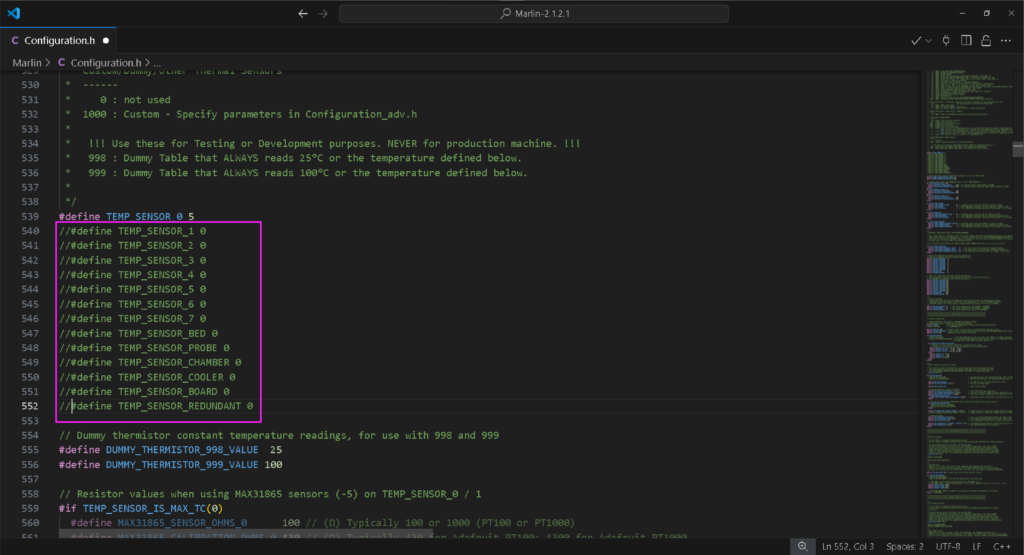
You can see after I commented on them by adding a double slash IN front of the lines of code, they all now appear in green color in VScode. This means that all those codes were commented out and because of that the thermistors I didn’t want active are now disabled.
Getting started
Choosing the motherboard
The first thing we have to do in the marlin firmware is to select the motherboard we are going to use, in this case, its a “ramps 1.6”. Even though we are using ramp 1.6, there wasn’t an option for 1.6 at the moment I’m writing this article. But worry not we can select the ramps 1.4 as the motherboard and continue.
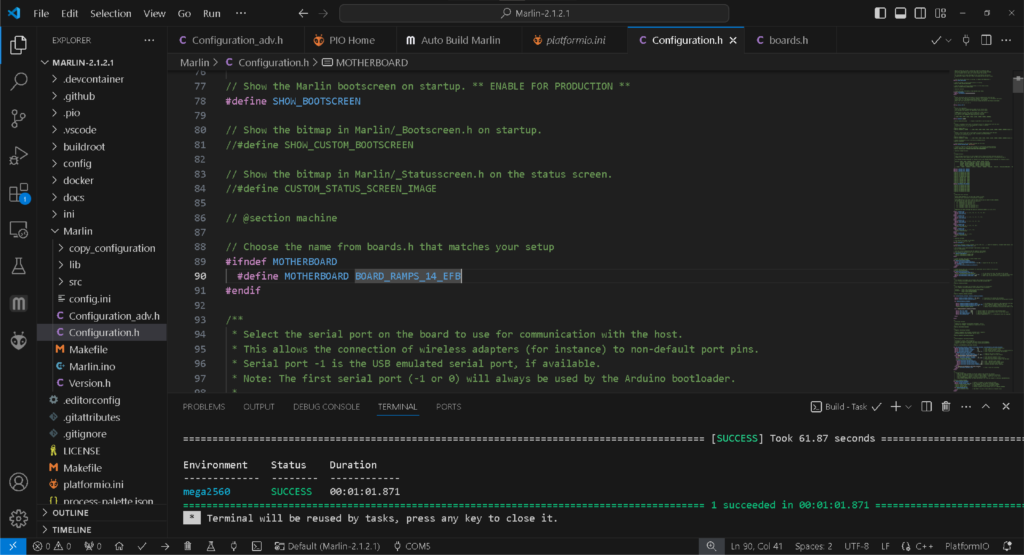
Here I have selected “BOARD_RAMPS_14_EFB” (ramps 1.4 board config)
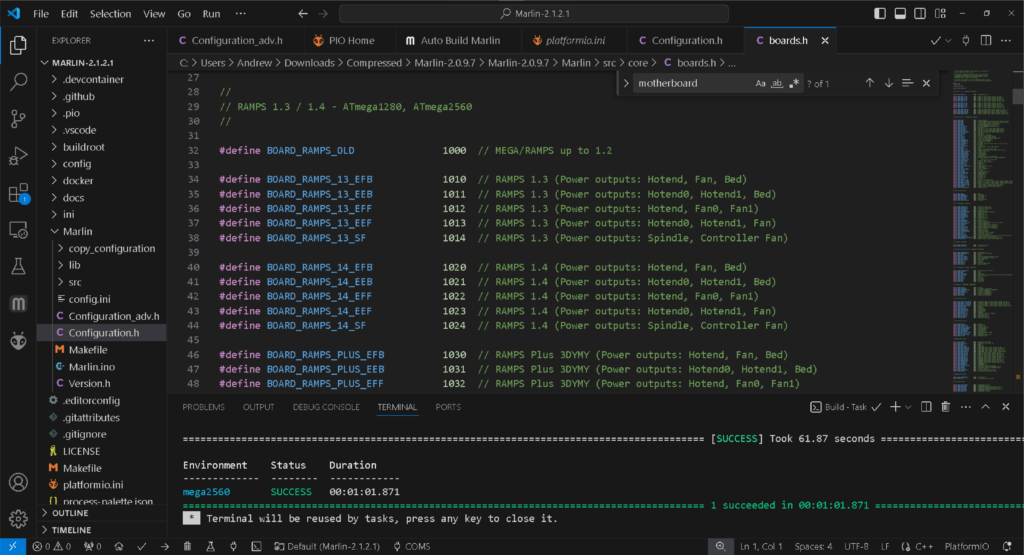
You can see all the board configs that were available for ramps in the Marlin firmware version 2.0.9.7. There aren’t any board configs for 1.6. But the configs for 1.4 work fine with the 1.6, so we can choose that. You can see there are 5 configs for the same 1.4 board, EFB, EEB, EFF, EEF and SF. You can see they’re well-documented in the firmware. We are going to select “BOARD_RAMPS_14_EFB” because in the printer we made we use a hot-end, a fan, and a bed.
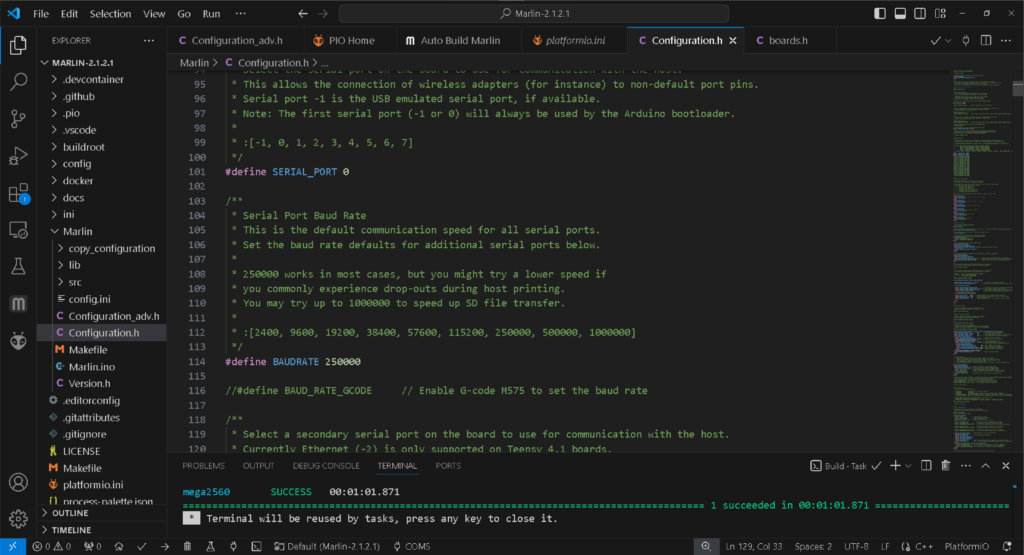
Usually, there’s no need to mess with the port and baud rate, so I suggest you leave it at default values unless your board is having any connection issues.
Stepper driver selection
Next up we have to select the correct stepper drivers. I have bought “DRV8825” drivers, so I will select them. If you’re using “A4988” drivers or any other driver that is supported, you can just copy and paste the name from the “Options” section right above and paste them IN front of the “DRIVER_TYPE”
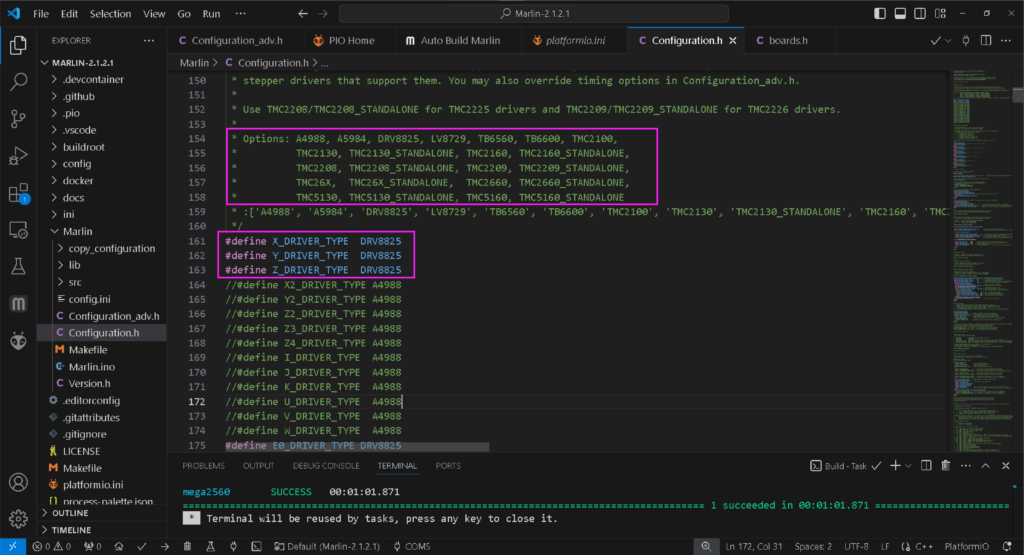
You can see all the available driver options in the “Options section”. We only need to enable the three drivers for the X, Y, and Z axis and one more for the extruder.
Extruder and filament diameter selection
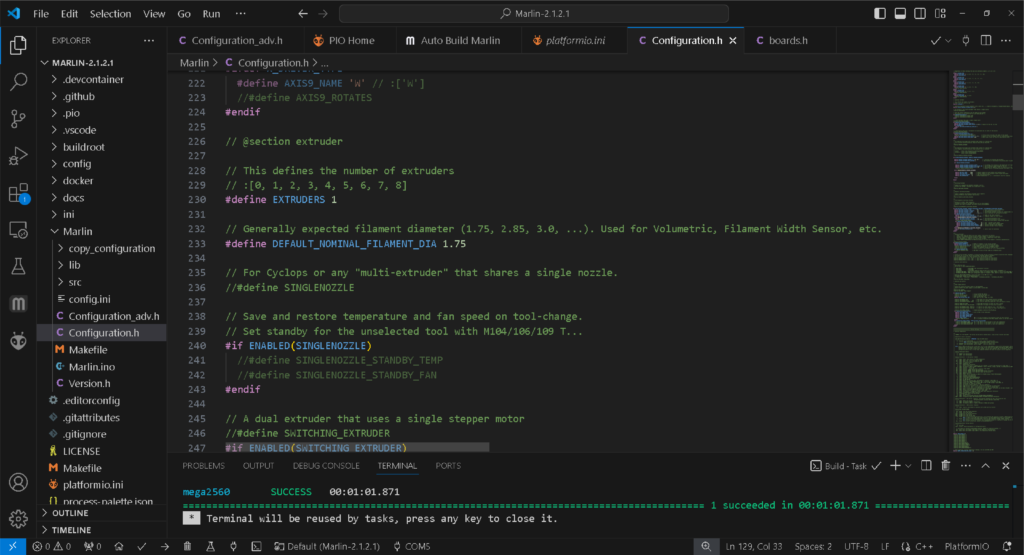
Unless you are making a dual or multi extruder printer you can select 1 extruder. The filament we are going to use in this printer is 1.75mm filament, you can change it here.
Thermistor and Thermal Settings
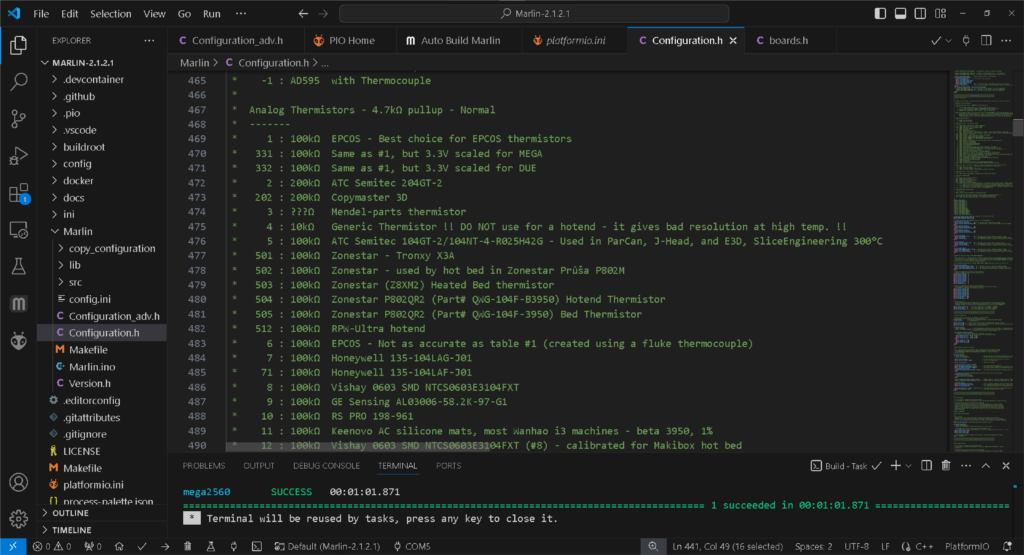
There are a lot of thermistor options available for us to select in the thermistor section. You must select the correct thermistor that corresponds to the one that you bought. If you select the wrong thermistor, it will read false temperatures and the print quality will suffer.
Every thermistor will have a corresponding number before it, we will have to put that number after the temp sensor number. for example “TEMP_SENSOR_0 5” five is the number for 100kΩ ATC Semitec 104GT-2/104NT-4-R025H42G thermistor which I’m using.
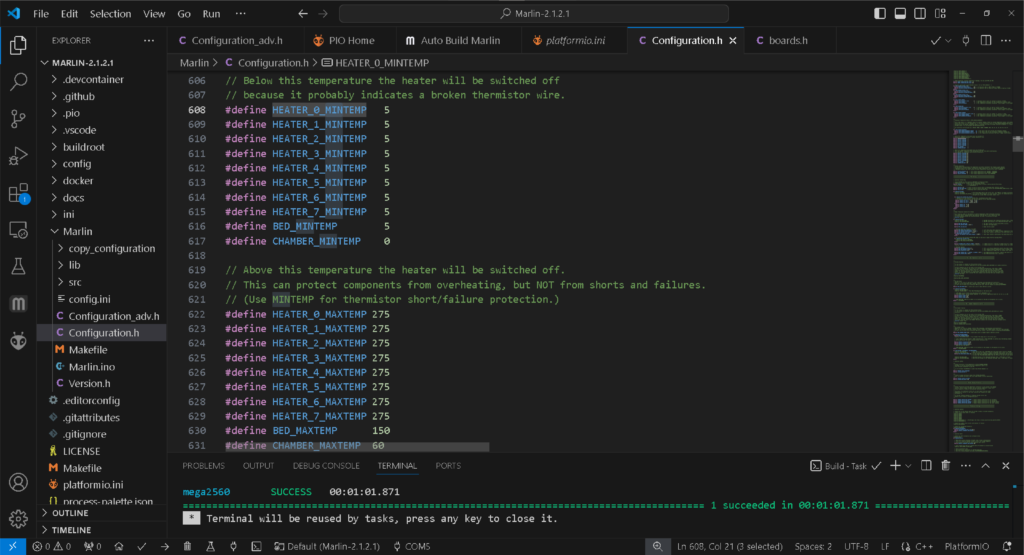
you can set the min and max temp as failsafe protection. I highly suggest taking a look at “Thermal Runaway Protection” in the firmware.
I also suggest not changing the PID values for the heaters, I found that the default PID settings are not that bad. Especially when you’re just getting started these default settings will do fine.
End-stop Settings
Most 3D printers nowadays use only 3 end-stops to home the printer. Then they will use the bed size to calculate the max end-stop values. You can set the end-stops in this section and change the logic of the end-stops if you see that they need to be inverted.
You can check the end-stop state in real-time with software like “pronterface” If you see that the logic state shows as “open” even when the carriage hits the limit switch, then you need to invert the end-stop logic for that axis.
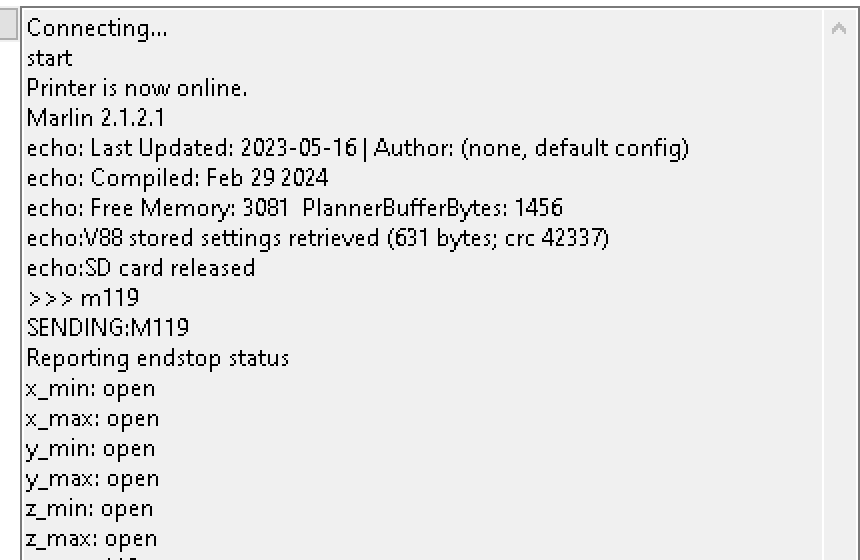
By sending the command “M119” to the printer via Pronterface we can see the state of the end-stops. In the image above we can see the state of the end-stops when no limit switch is pressed. We can see all the end-stop reports that they are open.
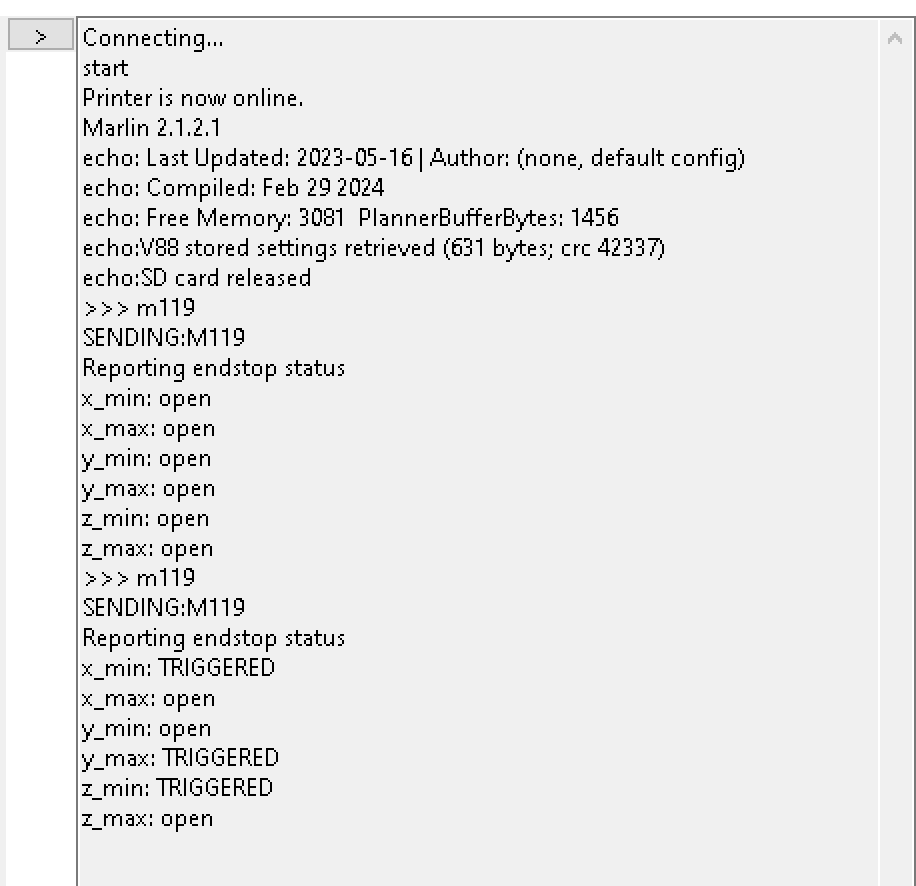
In the image above I have homed the printer and then sent the “M119” command again. You can see it now reports X_min, Y_max, and Z_min triggered. I have set the front left side of the print bed as the homing position. That’s why those limits are triggered.
if you see that the end-stop states report as “open” instead of “triggered” after you home the printer (or press a limit switch). Then your end-stop logic needs to change for that axis.
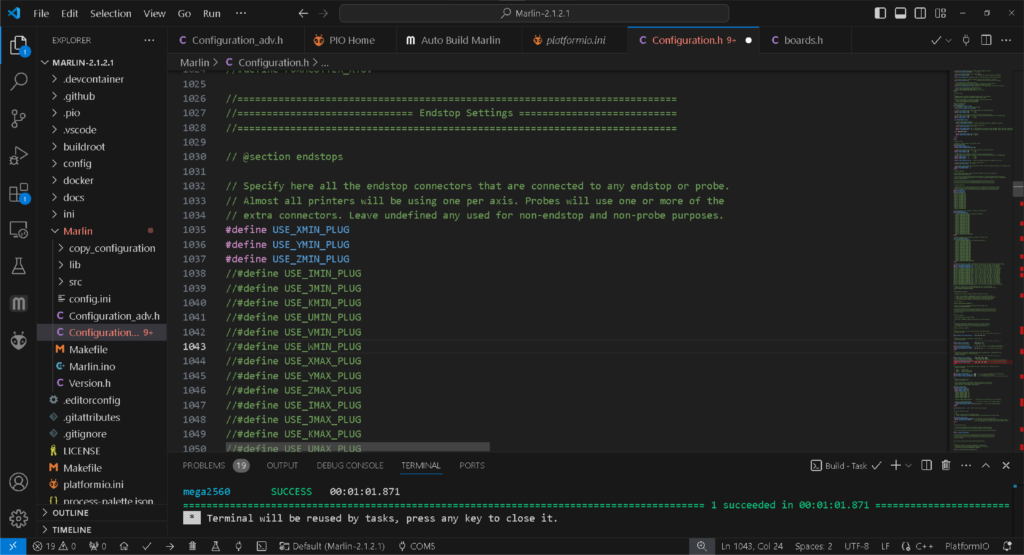
You can see in the image above that I have only used 3 end-stops. I have disabled all the other end-stops.
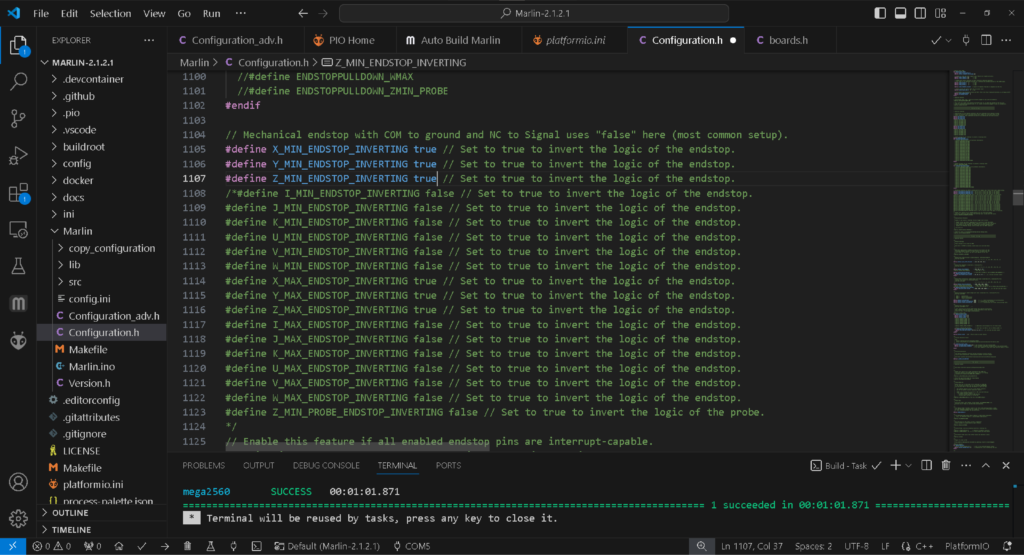
If you need to change the end-stop logic you can do it by changing the “false” to “true” like the image above.
